Baking | Christmas Tree Cupcakes
16:30
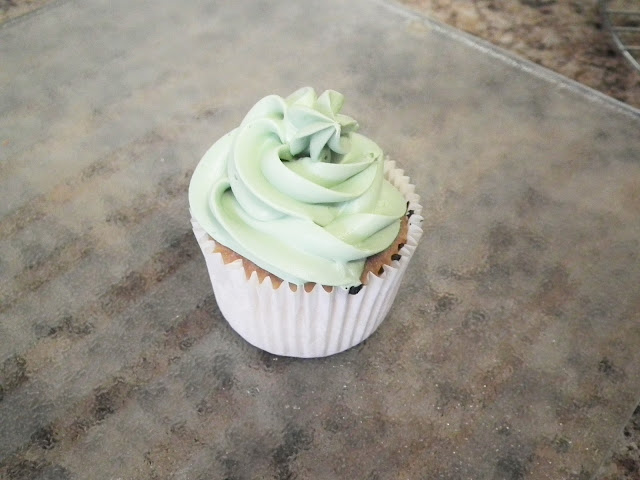
I really enjoyed sharing my last cupcake recipe (found here) with you last month. Today I thought would do the same. However this time I have decided to bake some Christmas themed cupcakes that are supposed to resemble a Christmas tree. I'm not 100% happy with them, but it was my first attempt so I hope that if I repeat these cupcakes next year that they come out a lot better.
I thought this would be something fun to do with only a few days to go until Christmas and a little sweet treat to enjoy that is perfect for this time of the year. This is a pretty easy recipe to follow, so why not grab a friend or a sibling and make these cupcakes together?
I thought this would be something fun to do with only a few days to go until Christmas and a little sweet treat to enjoy that is perfect for this time of the year. This is a pretty easy recipe to follow, so why not grab a friend or a sibling and make these cupcakes together?
You'll need (for 12 cupcakes):
- 125 g self-raising flour
- 1 teaspoon baking powder
- 125 g caster sugar
- 125 g soft margarine
- 2 eggs
- Cupcake cases
- Vanilla butter cream style icing (or any type of icing of your choice)
- Green food colouring
- Silver decorating balls
- Chocolate stars (or any chocolate of your choice that you might choose to melt and shape yourself with a star cutter also)
How to make:
- The first thing you need to do is to pre-heat your oven to about 180 degrees celsius.
- Next you are going to want weigh out all the ingredients into their correct measurements.
- Starting with the flour, you're going to sift the flour and baking powder into a mixing bowl. Once these two ingredients have been placed into the bowl, you're going to want to add the sugar, margarine and eggs into the bowl. At this stage you may also want to add any of your own flavourings to add something a little extra to the cakes.
- Now you are going to want to mix all of the ingredients you have added together. You can do this manually by either using a wooden spoon or a metal fork. Or if you have an electric whisk, then I would definitely recommend using that for quickness and to ensure you have mixed it properly. The mixture should end up looking smooth and glossy!
- Next you are going to spoon your mixture into 12 cupcake cases onto your cupcake tray. It is essential that you evenly spoon the mix into the cases to make sure that your cakes turn out the same size once baked.
- Finally place them into the oven for around 15/20 minutes, the time they take to bake depends on your oven. Once 15 minutes has passed, feel free to get them out of the oven and lightly place your knife in the middle of one of the cakes to make sure they are baked. If some mixture appear on the knife, pop them back in for another 5 minutes and repeat the step until no mixture comes off the knife and your cupcakes are looking a nice golden brown colour that are also springy when touched.
- Once they have been took out of the oven, leave them to cool on a cooling rack until they are cool enough for you to decorate.
- If you are making your own stars then keep reading but if not, then move on to the next step....To create your own stars, you are going to want to use whatever chocolate you have picked and you are going to want to heat it up in the microwave until they're almost melted then stir them through. For example, start heating them for 30 seconds, then check on them and repeat for another 30 seconds until fully melted.Next you are going to want to pour out the the melted chocolate onto grease proof paper, then place it into the fridge between 5-10 minutes until it is slightly set. You don't want it to be too hard as you will struggle to create your stars.Once it has just about set, take it and using your star cutter cut out 12 stars for your cakes.
- When the cakes are cool, you are going to need to add small drops of your green food colouring to your butter cream icing. It is essential to make sure you don't add 'too' much as you don't want your icing to end up being too runny as this will cause problems when it comes to piping. Once you have the 'perfect' green colour or if they don't end up any darker than the green I was able to achieve (haha) then feel free to move onto the next step.
- Next you are going to want to pipe on the green icing to create a spiral shape that somehow will reflect a Christmas tree. I find this part quite difficult, so you may want to redo it a few times until you're happy with what you have created.
- Once you have finished your piping, you're going to want to add your edible silver balls that will reflect baubles on a Christmas tree, to your piping and also add your chocolate stars to the top of the cakes. And then you are finished!
If you have a go at these, then I would love to see them, feel free to tweet me a picture @laaaureeen__ or comment below letting me know!
If you have a go at any Christmas baking this festive period, then feel free to link me to your pictures or posts! I'd love to see them!
Follow me on Bloglovin here and never miss a post!


2 comments